Pages

Showing posts with label Blogging. Show all posts

Tuesday, November 30, 2010

Online Reviews for Local Businesses Becoming More Visible


It's no secret that satisfied customers bring you more sales,
while unhappy customers can prevent sales. People who feel
strongly about a service they receíved or a product they
purchased are likely to tell others about their experience.


Before the internet, this effect was limited to word of mouth.
A customer could tell his family, friends and co-workers about
his great or terrible experience with your company. It took some
effort on the customer's part to get the word out, though, and
many of them wouldn't take the time. Very few of them took the
time to write a letter to the business or even tell friends
about it more than a few days after their interaction with a
business. Only if they were extremely pleased or displeased
would the word get out. 


The growth of the internet has made it much easier to praise or
complain about a company in a public place. There are many online
directories that allow anyone to post a comment about a business.
Not only does this allow a customer to make their opinion of your
products and services known to many more people, it also opens
the door to abuse. Business owners pretending to be customers
can post positive reviews. Disgruntled employees can post
negative reviews. There is no verification that the information
posted is true.


All of those reviews are about to become ten times more visible
to potential customers who are looking for a local business.
Google Places, formerly Google Local Business Listings, has
displayed reviews entered by users on their site and a number of
other directories. Now Google is integrating information from
the Google Places listing into the organic search. That's right.
You've worked hard to make sure that you are one of the first
few listings that shows up when customers are looking for the
services you provide in your area. Now, right next to the organic
listing is a link to customer reviews. Immediately below your
URL is your address and phone number from your Google Places
listing. Often a snippet of a review is there too. If this
happens to be a negative review, the potential customer will
almost certainly click on a different listing. It's the online
equivalent of someone standing in front of your business with a
sign telling people not to shop there. 


What can you do about it? Google won't remóve a negative review
just because you ask them to. And they won't take the time to
find out whether the information is accurate. You must encourage
positive reviews and address negative ones - with the customer
and/or online.


Encourage Good Reviews


If there are more positive reviews than negative, there's a
better chance that a review that shows within the body of your
listing will be good. Also, if a customer takes the time to look
at several reviews, they may be swayed by the happy customers.
You could encourage all of your customers to write an online
review, but that will result in more negative reviews as well
as positive. How can you approach only the satisfied customers
with a request for an online review? Here are a few ideas.


Many businesses already have a system in place to solicit
customer feedback, often in the form of a telephone follow-up
or written questionnaire. You could sort out those who have
responded favorably and send them a request for an online review.
If your request is in the form of an email, you could provide
links to your business's listings on various sites that accept
user reviews. You could provide something to your customer in
return for taking the time to post a review. A free ice cream,
10% off their next purchase from you, or some other prize could
entice them to make the effort and make them feel good about
your business at the same time. 


Address Damaging Reviews


If you can contact the unhappy customer and solve whatever
problem he had, he may be willing to remove the negative review.
Whether or not you think his complaint is valid, it's in your
best interest to fix it. This may cost you money, but not doing
so could cost you even more. Think about how much you spend to
bring in new customers. Don't let a relatively small amount of
money get in your way, even if the customer is wrong and you're
right.


Sometimes it will be impossible to get the customer to rescind
his post. You can still mitigate the damage by responding to the
complaint online. Post yóur own comment explaining the situation
or apologizing to the reviewer and stating your offer to fix the
problem. If a potential customer takes the time to read the whole
story, they'll see that you are trying to make your customers
happy.


Occasionally, a review will violate the terms established by the
review site, for example using foul language. If this is the
case, you can flag the review and it may be removed.


Other Tips


Don't enter multiple positive reviews yourself. Online
directories try to prevent fraudulent reviews because they make
their site less useful to their visitors.


Google Places displays reviews from sites such as Insider Pages
and Yelp, as well as reviews posted directly to Google. If you
ask your customers for positive reviews, give them links to a
variety of review sites. It will look more natural if reviews
come from more than one site.


It has always been important for a business to cultivate a good
reputation, but not ever before has a dissatisfied customer been
able to reach the public right alongside your advertisement.
More and more consumers are bypassing the yellow pages and
turning to their favorite search engine to find a business
instead. You can no longer afford not to know what reviews are
out there or to ignore dissatisfied customers. They have more
power than ever before.

Tuesday, September 7, 2010

Web Browser Cache!

One of the most frustrating things to happen when creating a web page is
when you can’t seem to get it to load on your website. You find a typo,
fix it and reupload, then when you view the page it’s still there. Or
you make a major change to the site and you can’t seem to see it when
you upload.


Web Caches and Browser Caches Affect How Your Page is Displayed


The most common reason for this is that the page is in your web browser
cache. The browser cache is a tool in all web browsers to help pages
load more quickly. The first time you load a web page, it is loaded
straight from the web server. Then, the browser saves a copy of the page
and all the images in a file on your machine. The next time you go to
that page, your browser opens the page from your hard drive rather than
the server.


The browser typically checks the server once per session. What this
means is that the first time you view your web page during a session it
will be saved on your computer. So, if you then find a typo and fix it
the upload may not display correctly.


How to Force Pages to Bypass the Web Cache


In order to force your browser to load a web page from the server rather
than the cache, you should hold down the shift key while you click on
the "Refresh" or "Reload" button. This tells the browser to ignore the
cache and download the page from the server directly.

Monday, September 6, 2010

How to Disable Right Click on Blogger?

Last time I posted a method on How to Disable Right Click Option? But that was for websites only.


Those blogger who want to disable right click option on their blog can proceed to read this post.


In order to Disable Right Click Option on Your Blog, follow the following steps:


1. Go to your Blogger Dashboard.

2. Click on Design. The "Page Elements" page appear.

3. Now, add an HTML/JavaScript widget and paste the following code in the widget:


<script language="JavaScript">

<!--


//Disable right mouse click Script

//By http://klustter.blogspot.com


var message="Right Click is Disabled";


///////////////////////////////////

function clickIE4(){

if (event.button==2){

alert(message);

return false;

}

}


function clickNS4(e){

if (document.layers||document.getElementById&&!document.all){

if (e.which==2||e.which==3){

alert(message);

return false;

}

}

}


if (document.layers){

document.captureEvents(Event.MOUSEDOWN);

document.onmousedown=clickNS4;

}

else if (document.all&&!document.getElementById){

document.onmousedown=clickIE4;

}


document.oncontextmenu=new Function("alert(message);return false")


// -->

</script>


4. Save the widget and you are done.


Now, when someone right click in your blog, they will get the message in red text.

You can change this text to your will.


Click Here For Demo


Leave a Comment Please

RSSOwl - Powerful RSS / RDF / Atom News Feed Reader

Windows/Mac/Linux: Feed reader RSSOwl has long been a favorite of
open-source advocates, despite being a bit less powerful than its
competition. Version 2, however, brings OPML import/export, sharing, and
smart searching, finally giving it powers to rival its desktop
counterparts.


If you were tempted by RSSOwl in the past, you may
have been turned off by its inability to import feeds from other
readers. Now, however, you can be set up and reading feeds exported from
other readers within minutes. It also features a tabbed interface, so
you don't have to constantly close feeds, and a built-in browser for you
to view the full content of any article. In addition, you can do away
with the usual 3-pane view and combine the rightmost two, viewing the
entire feed's content in one pane, Google Reader style.


Possibly the coolest feature of RSSOwl, though, is searching. The
app's got so many ways to search that it's a little overwhelming at
first, but it's extremely powerful down the line. You can have multiple
different conditions to any given search and save your searches—not
unlike the "smart playlist" feature of media players—and group feeds by
specific attributes. You can also use this as a filter, automatically
filing incoming articles into news bins (akin to folders in an email
client), marking them as sticky (akin to flagging or starring), or
applying labels (akin to...labels) for super organizational powers.


There are too many features to describe in detail—other highlights
include sharing via services including Facebook, Twitter, or Digg, and
notifications (that integrate with Growl in OS X)—so check out their full overview
for more detailed information. However, despite the power behind this
app, it still seems to be missing integration with Google Reader,
something we'd really like to see—but if you're not beholden to The
Google for web-based RSS, this is definitely an app worth checking out.


Download RSSOwl Here

Sunday, September 5, 2010

Traffic Exchange Websites To Increase Page Rank

Here are some Traffic Exchange website which are very useful if you want to increase your page rank but this is not the actual traffic, the visitors just come and go.. All of  them want to earn visitors, only visitors not quality visitors.


1. EasyHits4U


For every site you visit (they call this "surfing"), you will receive one visitor back to your site. EasyHits4U provide a fair 1:1 Exchange Ratio. There's no limit to the amount of free hits you can receive per day — 10, 100, or even 1000!


They also reward you with cash and additional traffic for being active in our traffic exchange.


But that is not all! Refer people to EasyHits4U.com using our
promotional materials and you will get 10% of the traffic they generate.
And not only from direct referrals — you'll also receive hits from
members they refer. their referral system grows up to 6 levels.


2. TrafficWitch


Every day thousands of new people join traffic exchanges to get free website traffic. Traffic Witch is on the cutting edge programs, bringing in new members to view your affiliate and splash pages. Endorsed and promoted by some of the biggest names in internet marketing world, Traffic witch is destined to be a player in the TE world.


The truth is there are probably many things that you look for in deciding on a new manual traffic exchange from fast and friendly customer service to earning real cash and commissions on upgrades and credit purchases. Traffic exchange advertising is becoming very fast paced and is one of the best promotional tools on the net to increase website traffic for free.


3. ClickThru


It is also a web traffic exchange website provides lot of page views.


When you use ClickThru.net you earn play money called ClickThru Cash.
Use it to buy real advertising or advertiser products without spending real money!


Surf the web by remote control. Surf sites in your favorite categories! Earn at least $0.01 for every site you visit. Plus, win up to $1,000 instantly for clicking a HotSpot! HotSpot are the tasks given by users which will earn you some more cash on completing.

Disable Right Click in Your Website/Blog


In my earlier post it is quiet clear that disabling right click can ruin your web page. But if you still want to disable right click on you website/blog, then following is the simplest method for it.


Use the script below so when someone right clicks to save an image off
your page, a message will come up letting people know that your information
is copyrighted.


This script only works on newer browsers, and it's not foolproof. If someone
really wants something from your page they can find ways around it, but
at least it's a warning to people who want to take your graphics. Copy
and paste the following code, and make sure it comes right after your
<HEAD> tag:


<script language="JavaScript">
// distributed by http://klustter.blogspot.com <!-- var popup="Sorry, right-click
is disabled.\n\n"; function noway(go) { if
(document.all) { if (event.button == 2) { alert(popup); return false; } } if (document.layers)
{ if (go.which == 3) { alert(popup); return false; } } } if (document.layers)
{ document.captureEvents(Event.MOUSEDOWN); } document.onmousedown=noway; // -->
</script>


Here is an example of website with right click disabled. Click Here For The Website 


In my next post, I'll show you how to enable right click option on such websites.

Saturday, September 4, 2010

Why Don't Disable Right Click?


Yesterday, I posted that Why some website/owners disables right click option in their websites. They think that this is the right way of avoiding content theft but in return they harm theirselves by doing this.


Right Click disabling might sounds Ok, but this isn't generally a good idea. Why not?


It's annoying!


You don't realise just how much you use right-click until you can't use it! There are a lot of useful features in the short menu that it opens up. While most are also available in the main browser menu, it's often much quicker to use the right-click menu -- this is usually the closest menu you have available.

It's pointless!


If you think disabling right-click will protect your source code or images, think again! Anyone who's determined to copy your content or code will do so regardless of his or her ability to bring up a browser context menu. If they want your source code then it's as simple as selecting 'view source' from the main menu. Article text can be highlighted and copied, images and media presentations can be retrieved from the cache, and streaming media can be recorded.

Disabling right-click will only make people more determined to learn exactly what it is you're hiding. And this could end up being counter-productive, as your images and source code attract unwanted attention. Not only that, but you can only disable right-click on browsers that have JavaScript enabled: a visitor only has to turn off JavaScript in their browser's options to be able to ignore the script altogether!

It's disabling!


Mouse gestures that enable quicker navigation are starting to become a feature of browsers: Opera has them, Mozilla has just added support, and it's only a matter of time before Internet Explorer adopts them. Disabling right-click on pages viewed in these browsers also disables the ability to use mouse gestures, so you won't be popular with those that use them frequently!

Even when you don't make use of mouse gestures, their absence can still seriously affect your ability to browse the Internet. I tend to open any links from a page I like in a new window from the right-click menu, so that I can read and compare both pages and return without having to use the back button. While you can open a link in a new window by holding down shift while clicking on it, many find it easier to use the option from the right-click menu. Disable right-click and you'll alienate these users pretty quickly.

It's unprofessional!


Ask yourself this: would you buy something from a site that reminds you its images are protected by copyright every time you go to use right-click (even when your pointer is nowhere near an image)?
Disabling right click suggests a lack of professionalism to users.


It's insulting!

 
Most of your visitors will come to your site looking to buy something, or to find information. Only a small percentage of your visitors will land at your site with the intention to steal from it. By trying to protect yourself from the minority, you effectively insult the majority, who will use the right-click menu for legitimate reasons. Do you really expect your visitors to trust you when you offer them "helpful reminders" that imply you can't trust them?

Granted, some people will want to view your source code -- but don't assume that everyone who looks at it will want to use it on their site! Savvy visitors that are aware of deceptive techniques used by some unscrupulous site owners may just want to check that a link is going to take them where they think it will take them. Does that make them a thief?


So, its not a good idea to disable right click on websites in order to avoid content theft.

Friday, September 3, 2010

Why Right Click is Disabled in Some Websites?

You would have noticed that the Right Click function of Mouse is disabled in some websites.


But why the owners of the website disable Right Click function of Mouse?

Well! We all know that Contents Theft is one of the biggest crime (you can say) of the Internet World.

According to me, more than 90% Websites and Owners are fed with Stolen Contents. This is shame for those thieves. They found it very easy and straight, just Highlight all the Text and Click Copy and then Paste it in the new post. They do it just for money and rank and when they get a higher Rank then they are Boosting to their friends (etc...) that they have a High Rank on the Web. But this is not the good way. And I also don't like this.

The real problem is not content theft but the problem is that most of them publish the stolen content without crediting. That is why it is a very big loss to the Writer of the Contents. The Writers spend days and nights writing good contents for their readers, after a long research and surveys and the leachers publish them so carelessly without crediting.

So, for minimizing the content theft, some websites and blog owners Disable Right Click function of Mouse on their web pages so that the readers cannot copy their content. But, I think this is not the successful way of content security. Anyway, they block the Right Click function for this purpose.

This "Disabled Right Click function" can be broken very easily and have lot of disadvantages for the website or blog owners, therefore this is not popular.

This was about "Why Website/Blog Owners Disable Right function on Their Websites" and I'll post about "How to Disable Right Click in Websites/Blogs" in a couple of days.

What do you think about the Right Click Disabling in web pages, is a good function or bad? If bad, then Why?

Wednesday, September 1, 2010

New Blogger Widgets added to Blogger Wisgets' Page

Blogger has finally added the new two widgets to their widgets page. These two new widgets are Popular Posts widget and Blogger Stats. You can easily add them to your Blog page as you add the other widgets, simply.


1. Popular Posts Widget


This widget will show Popular Posts which mean the posts which have more visits.


2. Blog Stats Widget


The Stats widget will show the unique number of page views of your blog.


Blogger did a very good job for publishing these widgets. It will help all the Bloggers because most of the blogs has Popular Posts widget which is added by adding some CSS and HTML codes which may be mind freaking for those blogger who do not know more about CSS and HTML.


And this, finally, kicked off the freaking codes. So, simply add the Popular Posts widget to your sidebar and increase your Page Rank as most readers look for Popular Posts of the Blog  and now Your Blog's Popular Posts are available at the sidebar.


I know that this update will bring a little smile on the newbies and those who do not know more about HTML.. :-)


You can see the Popular Posts widget at my sidebar.


Enjoy using these widgets.

Sunday, August 29, 2010

Useful Online Tools For Bloggers

These are some useful online tools which can make your work easier and faster because you don't have to download any software to do your work. Just put in your input and get your work done.

1.Convert Files

Easily convert different file formats. You can convert images, download YouTube video and much more with this web tool.

2. Joongel

Are you a power searcher? Then this tool this for you. You simultaneously search different search engines in different categories. It can be very useful if you are doing an online research.

3. Quick Thumbnail

Simply create thumbnails in different sizes right from your browser. You can upload an image from your computer or web directory and choose sizes of the thumbnails you want.

4. ScreenCastle

Have you ever wondered if you would be able record your screen right from your computer without any software? Yes you can. This tool would be useful if you would not want to download any large software or if you are not at you own computer. This is uses java applet to record your screen.

6. Mockingbird

Another handy tool for project mangers, designers and developers. Simple and easy wire framing for your project. The interface is very easy to use.

7.  Cyclur

If you maintain multiple websites and wanted show feeds between you websites, Cyclur will get the job done with knowing too much coding. Just simple insert your feeds link and customize the look.

8. Flipping Typical

Filpping Typical is an useful online utility for web designer to preview a text in different fonts. Type in the text you want to preview and you will see it right away and it also gives you the font name.


9. DevCheatSheet

A collection all kind of cheat sheets for different markup and scripting languages on the web. Do not need to Google for hours for cheat sheet you saw last week. You can find it in DevCheatSheets.com

Saturday, August 28, 2010

Add Numbered Page Navigation Widget to Your Blog

Numbering Navigation Widget is very useful for blogs because it tell the visitors that how many pages this blog has and from those pages the visitor can calculate that how much posts this blog contain.

This widget is place at the bottom of the template where "Newer Posts" and "Older Posts" are shown.
It looks like this:


Follow the instructions to place this widget on your Blog.

1. Go to Your Blogger Dashboard.
2. Click on Design Page.
3. Now, Navigate to Edit HTML tab

Better not to check the box "Expand Widget Templates"

4. Now, search for the term   ]]</b:skin>
Copy and paste the following code just before ]]</b:skin> 

    
.showpageArea a {
text-decoration:underline;
}
.showpageNum a {
text-decoration:none;
border: 1px solid #cccccc;
margin:0 3px;
padding:3px;
}
.showpageNum a:hover {
border: 1px solid #cccccc;
background-color:#cccccc;
}
.showpagePoint {
color:#333;
text-decoration:none;
border: 1px solid #cccccc;
background: #cccccc;
margin:0 3px;
padding:3px;
}
.showpageOf {
text-decoration:none;
padding:3px;
margin: 0 3px 0 0;
}
.showpage a {
text-decoration:none;
border: 1px solid #cccccc;
padding:3px;
}
.showpage a:hover {
text-decoration:none;
}
.showpageNum a:link,.showpage a:link {
text-decoration:none;
color:#333333;
}

This is the CSS part of the widget which defines the properties and work of your widget (Navigation Widget).

Now, its time to add the HTML code of the Widget.
So,

5. Find   </body>. And copy the following code and paste it just before the  </body>

<!--Page Navigation Starts-->
<b:if cond='data:blog.pageType != "item"'>
<b:if cond='data:blog.pageType != "static_page"'>
<script type='text/javascript'>
var pageCount=5;
var displayPageNum=5;
var upPageWord ='Previous';
var downPageWord ='Next';
</script>
<script src='http://blogergadgets.googlecode.com/files/blogger-page-navi.v1.js' type='text/javascript'/>
</b:if>
</b:if>
<!--Page Navigation Ends -->

Save Your Template and Your are done. You can see the Navigation Template in your Blog.

Customization :

var pageCount=5; : This code determines the number of posts that displayed on each page

var displayPageNum=5; : This code determines navigation numbers displayed on the page navigation widget(like 1 2 3 4 5 ...).

var upPageWord ='Previous';
var upPageWord ='Next';
These lines of code is for for Previous and Next page link.(Previous 1 2 3 ... Next)

Tuesday, August 24, 2010

Watch the Watchers of Your Blog - Web Stat

Web Stat is a website which monitors your blog/website's visitors. It can do a lot of works for you such as the location of your visitors, which pages they visit in your blog, how much time they spent in your blog and etc...

It also provides LIVE streaming. When you log in to your Web Stat account, you will be able to see that who is viewing your blog that time.

Streaming map of recent visitors:

It shows you the recent viewers of your blog. As it locates your visitors, so it can show you the information about each visitor such as their region, country, time of visit etc. It also shows that if a visitor is new or old and if the visitor is old then it can also show you the time when the visitor last visited.


I found it very interesting.


You should try Web Stat to keep an eye on your watchers.

Sunday, August 8, 2010

What is a feed ?


What is a feed?
If you’re used to surfing the internet and viewing blogs, you probably already know what a feed is. If you don’t, then read on. A feed is basically way for a blog’s or website’s visitor to subscribe to the site using a web page, feed reader or email to subscribe.

New posts are automatically delivered to the chosen subscription method so that the user can read new posts from their favorite topics whenever they are updated, without having to surf from site to site looking for new posts and updates.

What is an RSS feed?

RSS is the most common feed type. RSS stands for Really Simple Syndication.
It is a text-based XML format. The feed content is delivered to your favorite RSS feed reader. The most popular web-based RSS feed readers are Bloglines and Google Reader. Here’s a list of Windows based RSS feed reader software.

Apart from RSS, the most popular feed type is Atom. It also uses XML to deliver the feeds.

Subscribing to an RSS feed

Subscibing to a feed is pretty simple. Let’s walk through the process together.

Step 1: Find the RSS feed. Most blogs have their feed icon at the top right area of the page, look for the orange feed icon or RSS. On this blog, I have a custom, blue RSS feed icon.

If you can’t find the feed icon on a blog (90% of blogs have it) don’t worry. Most feeds are at http://www.example.com/feed so try adding the /feed to the end of the blog’s adress. (My feed is at http://feeds.feedburner.com/Guide29-Tutorials For blogs at blogspot.com, add feeds/posts/default to the end of their domain to find the feed. Example: http://example.blogspot.com/feeds/posts/default.

Step 2: Subscribe. Click the feed icon and you’ll be taken to the feed page. From here you can choose which feed reader to use. I recommend Google Reader. Choose your preferred reader and continue.

Step 3: Read. Now you are subscribed to the feed. You should be redirected to your RSS feed reader and you can start reading feeds.

If You Like This Post Do Share This With Ur Friends .

Saturday, August 7, 2010

Add an MP3 to Your WordPress Sidebar with the Simple Music Plugin

Simple Music is a new plugin that makes it extremely easy to add an MP3 to your sidebar with a drag and drop widget. Setup and configuration can be done in under a minute.

Features of Simple Music:

  • Bulletproof Functionality – Just enter the song URL and go!
  • Easy Settings – Upload a file or find one online, choose to autoplay the track, repeat, and more!
  • Fast Customization – Changing the options, such as picking a new song or adjusting the settings, is a snap!
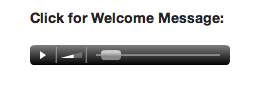
This is a great way to add a personalized welcome message to your site or share music with your readers.

Friday, August 6, 2010

Another Cool Tool To Optimize Your Site Loading Speed

As you probably know the loading speed of your site is a very important factor. Not only it affects the user experience, but it is also used as a search ranking parameter by Google now.

In the past I talked about some tools you can use to test and optimize the loading speed of your site, but a couple of weeks ago I came across a new one that is worth a mention, too.

You can find it on WebPageTest.org. First of all you need to input the URL of your website, choose a geographical location to perform the test, select a couple of options and then click on “Submit.”
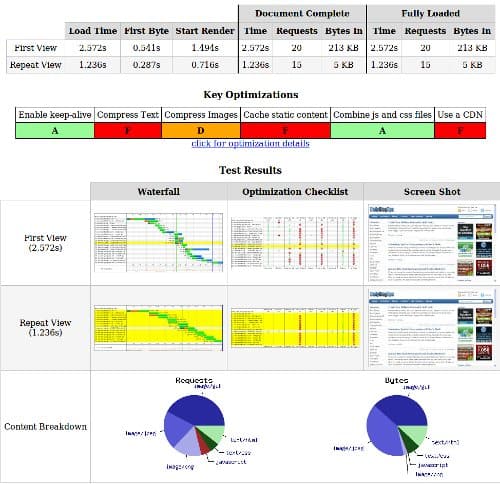
It takes 30 seconds or so to complete the test, and then you’ll see a results page like this one:

optimize-site-loading-speed


You’ll get the loading time of your website on the first and second visit (these numbers will be different if you use caching. The tool also gives you a grade on 6 areas (Keep-alive, text compressions, image compressions, caching, CSS and JS combination, CDN), and detailed graphs explaining what optimization steps you failed at and what elements make most of your page’s size.

Wednesday, August 4, 2010

18 WordPress Calculator Plugins to Engage Your Visitors

Calculators are often overlooked as a simple utility, but you might be surprised by how much they increase user interaction on your site. If a user finds your calculator extremely useful, he’s likely to bookmark your site so that he doesn’t have to search for it the next time. You may not be aware of the variety of calculator plugins available for WordPress, so here’s an excellent sampling of recently updated plugins that will perform calculations on your website.


If your site depends on being able to provide some sophisticated calculations for your visitors, then WordPress has the calculator for you. Many of these can be used in combination with a BuddyPress site to promote a community that’s based on mutual interests and goals, such as running, losing weight, or getting out of debt.

Mortgage Calculator Sidebar Widget

A Mortgage Calculator sidebar widget that enables your visitors to calculate their monthly payments towards their mortgage.

Download Plugin

Mortgage Loan Calculator

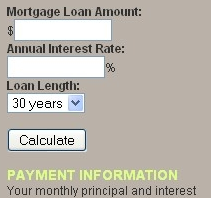
This is a sidebar widget that calculates your principal and interest mortgage loan payment. You insert the loan amount and interest rate (pop up tells you to insert a number if you put anything other than a number in), choose the length of the loan from a drop-down, and press the calculate button. Your payment information is displayed.

Download Plugin

Financial Toolbox

The financial toolbox includes a news ticker for the latest financial news along with an integrated credit calculator.

Download Plugin

Net Worth Calculator

This plugin helps you keep track of your monthly assets, liabilities, and net worth. You can mark any asset or liability value as private if you do not want it to displayed.

Download Plugin

Debt Reduction Calculator

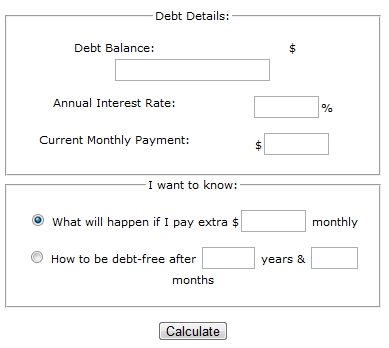
This plugin displays functional debt reduction/debt payoff calculator. It shows people how they can pay debt faster or how much they need to pay extra each month in order to be debt free after choosen period of time.

Download Plugin

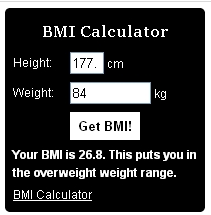
BMI Calculator Widget

This plugin will let you add a fully customizable BMI calculator widget to any widget enabled space. Both standard & metric input options and full color customization to match your theme exactly are available.

Download Plugin

Zodiac Calculator

This plugin provides sidebar widget that displays your visitors’ Chinese and/or Western zodiac signs based on their date of birth without reloading the page.

Download Plugin

Runner’s Log

This plugin let you convert your blog into a training log and let you track your distance, time, calories and calculate your speed, time per km(or miles), and let you have advance statistics. It includes a Training Zones Calculator, VDOT calculator, V02maxulator Calculator, Race Time Calculator, Training Pace Calculator, Body Mass Index Calculator, Calculate Predicted effect of change in weight.

Download Plugin

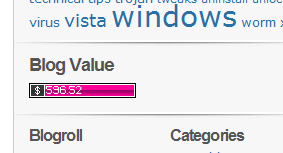
Blog or Website Value Calculator

This is a plug-in that gives you a nice tidy widget to display your blog’s current estimated value in dollars. This information is displayed to you and your visitors to demonstrate just how much hard work you have put into your blog.

Download Plugin

Math Calculator

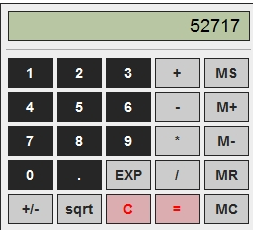
This is a simple calculator can be used for quick on site calculations. Check http://www.calculator.net/math-calculator.html for a demo of this calculator.

Download Plugin

NACC WordPress Plugin

This is a WordPress plugin implementation of the N.A. Cleantime Calculator. When you use the shortcode for the plugin, it will calculate and display cleantime.

Download Plugin

Time Zone Calculator

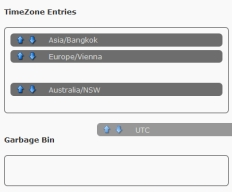
This plugin calculates, displays and automatically updates times and dates in different timezones with respect to daylight saving. The calculator uses AJAX and is based on the PHP timezones database.

Download Plugin

Overweight Calculator

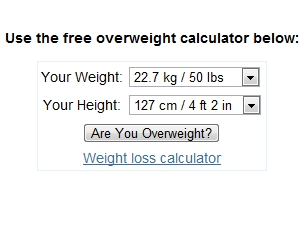
This plugin displays functional overweight calculator / BMI calculator. It can be used to check the user’s Body Mass Index and suggest the recommended weight range.

Download Plugin

Love Calculator

This love calculator evaluates the compatibility of two people based on names. The score range from 0%-100%. The higher the score the better. This calculator can be inserted either to the sidebar or into the post, but not both. Check http://www.calculator.net/love-calculator.html for a demo of this calculator.

Download Plugin

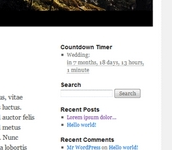
Countdown Timer

Countdown Timer allows you to setup one or more dates to count down to or away from. Events can be inserted into the sidebar, either manually or as a widget, or within posts and pages.

Download Plugin

GeneralStats

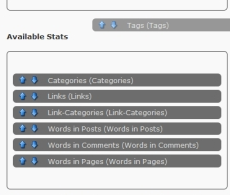
This plugin counts the number of users, categories, posts, comments, pages, links, tags, link-categories, words in posts, words in comments and words in pages with AJAX functionality.

Download Plugin

Post Stats

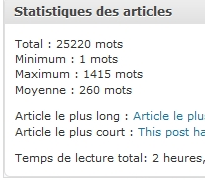
This plugin calculates and displays total number of words in blog posts, minimal and maximal post length, shortest and longest post (title and permalink), and estimated reading time of the blog posts. It can be displayed in the dashboard, on a sidebar widget, or before and after each post.

Download Plugin

Price Calc

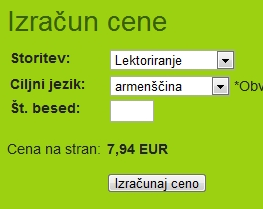
This is a plugin that shows a n inter-active price calculator form on any post, page or widget content. Let your customers view automatic bids and cost estimates for your products and services. You can set up a set of product variations and freely define a price structure.

Download Plugin

Change WordPress login page URL


Change WordPress login page URL
Wordpress Login
As you might know, the default login page in WordPress is  domain/wp-login.php.  Almost every other person in the world knows that it is the login page of a WordPress blog. So if someone gets yourpassword, it is easy for them to login to your WordPress dashboard and change the default password.  Trial & error and  brute force attacks by bots on a particular page would also lead to password theft. Stealth Login is a WordPress plugin that can be used to change WordPress login URL to custom URL and prevent such incidents.


Stealth Login is a WordPress plugin :

Stealth Login Settings
Stealth Login WordPress plugin options:

Download the plugin here, upload to the  WordPress plugin directory and activate. As you can see from the screenshot, there is a simple option to customize WordPress login slug. First, turn the plugin ON and enter the required login URL slug in the login slug box. Now enable stealth mode and save changes.  Plugin will start working from the next login.

Tuesday, August 3, 2010

BuddyPress Humanity: The Newest Weapon to Fight Signup Spam


 Welcome BuddyPress Humanity, the latest plugin on the scene to help you combat BuddyPress signup spam.
As you can see from the screenshot, this plugin will add a customizable security question to the BuddyPress signup form. You can write your own question, change it as often as you want, and assign the correct answers to verify the user’s humanity.

This plugin currently works perfectly when WordPress Multisite is enabled, but if you want it to work with single user WordPress, you’ll need to do this one small switch:
Find this in the buddypress-humanity.php file:

add_action('bp_after_blog_details_fields', 'bph_show_input_field');
and replace it with this:

add_action('bp_before_registration_submit_buttons', 'bph_show_input_field');
I’ve notified the plugin developer about this and perhaps he’ll change it, so make sure to test the plugin to see if it works for you before changing the file.

Please note that BuddyPress Humanity will not completely eliminate spam, but it will definitely deter some bots and help you spend less time deleting spam users. If you’re suffering from more spam than you can keep up with, give this plugin a try and see how much it can cut it back for you.

Looking for other, more effective methods for stopping the onslaught of BuddyPress signup spam? Check out Anti-Splog, the most comprehensive spam-killing plugin currently available for WordPress, Multisite and BuddyPress. It’s powered by our new Anti-Splog API service that effectively learns as it kills spam across thousands of blogs connected to the service. You won’t find any other solution out there that can rival Anti-Splog.

Monday, August 2, 2010

ManageWP – A Single Dashboard for your WordPress Blogs

If you’re someone that manages more than one WordPress blog you’re going to love ManageWP. It’s an amazing tool that lets you manage all of your blogs from one centralized dashboard. Signing up and getting started is a simple as 1, 2, 3; first setup your account, then add your WordPress blogs, finally manage them from the dashboard.


In their own words:
“ManageWP is a WordPress service offering modern technology to manage multiple WordPress blogs from a centralized Dashboard.”
So whether you’re someone who just has a few blogs, or you manage WordPress blogs of several clients, ManageWP will be a tool that you’ll want to keep close at hand. ManageWP is actually built on a WordPress blog itself. So, when registering you’ll just need to enter your username a email; a password will be emailed to you.


Next you’ll need to add your blogs. To do this you’ll first need to add the ManageWP Worker plugin to the blogs that you want to manage. Then you’ll have to enter your URL, username and password into the ManageWP dashboard area. If you’re worried about the security of your account, be sure to check out their privacy page.

The control panel will show you which plugins on are up to date. You can upgrade all the plugins (on each of your blogs) at once with the click of a button. This is a definite time saver — rather than having to go to each blog separately. From the control panel you can also upload new themes and plugins, create new blog posts and pages, import/export, clone blogs and backup/restore.
Under the sites area, you’ll have options that you can perform on each blog individually (instead of all together). You can manage posts, pages, categories, tags, comments, plugins and themes. If there is a new version of WordPress available, you can even upgrade the blog right from here. When you click on a button/action, it actually opens up a new tab (along the top of the dashboard). Then you can simply click the X on the tab to close it out when you’re done.


The company is also planning to offer a self hosted version of ManageWP for companies and individuals out there that want to run their own dashboard. It’s still in the works but you can sign up to receive notifications about its release. This is great if you do have numerous clients and want to use your own domain to manage them all in one place.
ManageWP is a lifesaving tool that will save you lots of time and effort. It’s such a convenience to be able to login to just one WordPress blog and manage all of your blogs from there. I have 6 sites that run WordPress and this plugin has really made my day. How about you?

Reinvigorate – A New Way To Track Blog Analytics

It had been so long since I’d signed up for the Reinvigorate beta that I’d practically forgotten what it was. – and the name didn’t give it away. As it turned out, Reinvigorate is a web-based analytics program (it also has a desktop reporting program) so I promptly accepted my invitation to test it and downloaded and installed the WordPress plugin, entering my site ID to enable it to start tracking.  (If you’re not on WordPress, don’t worry, as you can simply use the tracking code.) I’ve been down this route before, trying out many analytics programs before settling on one I liked. Would Reinvigorate be the program that could seduce me away from my beloved Cliky?

Getting Started

The first page you see on Reinvigorate is the overview page, which features two large boxes showing the number of active visitors and active pages. This is similar to the Spy view in Clicky (but without the map). Click on the small report link on each button and you can see more detail, such as the page title and when it was last accessed. Reinvigorate has a ‘name tags’ function that is supposed to tag visitors and commenters by name to make your reports more reader friendly, but this does not seem to work very well, though it did tag me once. Also on the home page is an indication of how long visitors have spent on your site that day, how many visitors there have been, how much of that is referral traffic and what the bounce rate is.

What’s On The Tabs

A number of other options appear next to the summary tab, but these are setup options (name tags, snoop, tracking code and preferences). If you want more stats, move to the top row of tabs and click on one of the options, each of which has further sub-tabs:
  • Traffic (hourly, daily, weekly, monthly, referred, visit length, bounce rate, entry pages, page summary)
  • Visitor Detail (browsers, platforms, screen, regions, languages, time zones)
  • Session (visitors, activity, detailed activity, active pages, heat map)
  • Search and Referrer (referrers, referred visitors, referred searches, top referrers, keywords)

In-Depth Analysis

Click on any option or sub-option and you get a couple of graphs and a table for varying periods. You can change these via a drop down menu. Most of tabs give the information you expect, so I won’t outline those in detail, but here are the functions I thought were pretty cool:
  • the pie chart showing top pages on your site
  • the heat map showing the areas of a page or post that attracted most attention from visitors
  • the detailed activity listing showing you how long a particular visitor spent on a certain page
  • the table showing when your top referrers last sent you traffic
  • the map showing which time zones your visitors are in (trust me, this is cooler than it sounds!)

A Promising Start

My first impressions of Reinvigorate are that it’s promising, offering some of the same real time functionality as programs like Clicky and Woopra. However, there are still a few things to be improved, such as the ability to exclude your own visits to your site. Its visitor figures also differ from those recorded in Clicky (so one of them has to be wrong). I’ll look forward to seeing what else Reinvigorate has to offer.